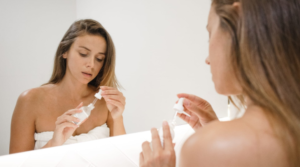
10 Steps of Make-up for Oily Skin
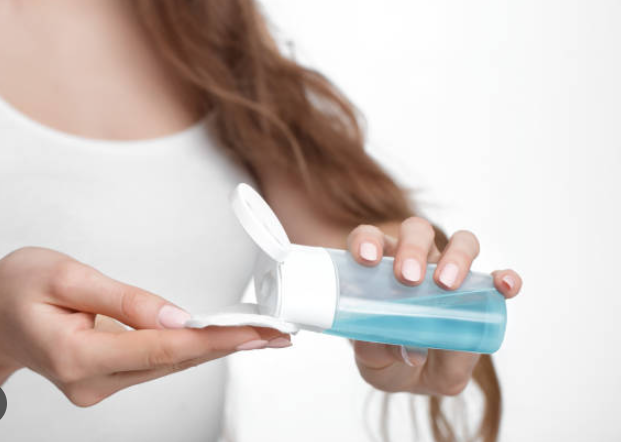
1. Cleansing for Oily Skin :
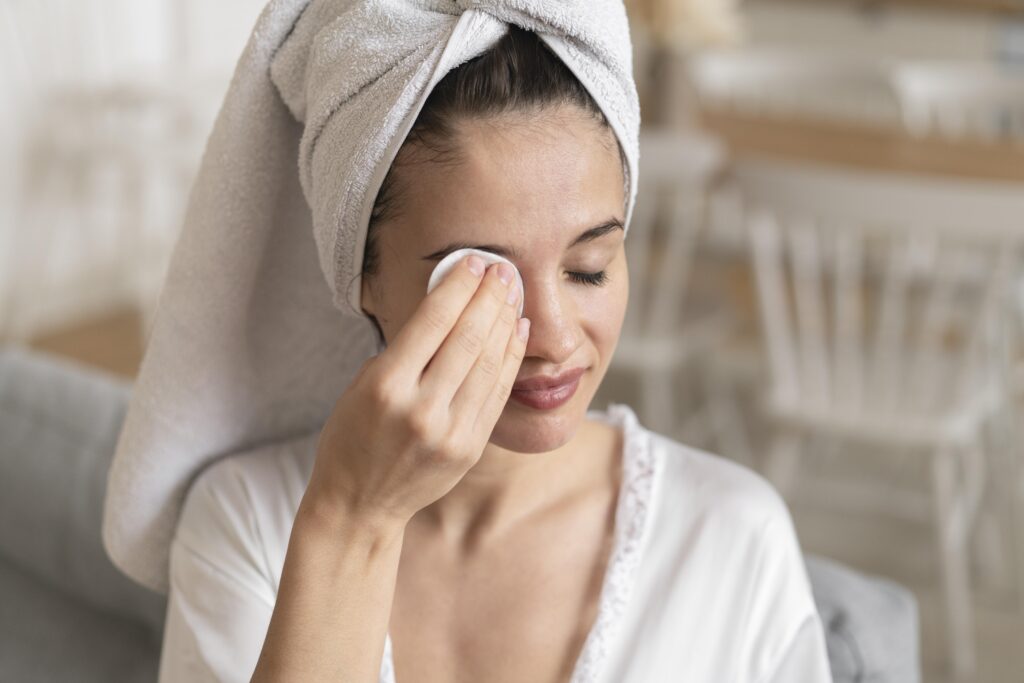
Why Cleansing Is Important for Oily Skin
Oily skin produces excess sebum, which can:
Clog pores and cause blackheads, whiteheads, or acne.
Make your skin look greasy or shiny.
Reduce makeup longevity and cause it to slide off.
Proper cleansing removes:
Excess oil
Dirt and pollution
Bacteria and sweat
Makeup residues
This helps in keeping your skin clear, balanced, and ready to absorb other skincare or makeup products.
How to Cleanse Oily Skin (Step-by-Step)
Step 1: Wash Hands First
Dirty hands can transfer bacteria to your face.
Use soap and water before touching your face.
Step 2: Wet Your Face with Lukewarm Water
Avoid hot water (it strips natural oils and triggers more oil production).
Avoid cold water (it may not dissolve oil properly).
Step 3: Apply Cleanser
Take a small amount (pea-sized or 1 pump).
Gently massage onto your skin in circular, upward motions.
Focus on oily areas: forehead, nose, chin (T-zone).
Step 4: Massage for 30–60 Seconds
This ensures dirt, sebum, and debris break down properly.
Don’t rush this step — effective cleansing reduces breakouts.
Step 5: Rinse Thoroughly
Use lukewarm water to wash off the cleanser completely.
No residue should remain, especially around the nose and jawline.
Step 6: Pat Dry (Don’t Rub)
Use a clean, soft towel and pat gently.
Rubbing irritates the skin and can increase oiliness.
Ingredients to Look For in Cleansers for Oily Skin
Salicylic Acid : Unclogs pores, reduces acne, exfoliates dead cells
Niacinamide: Controls oil, improves skin texture, reduces redness
Tea Tree Oil: Antibacterial, good for acne-prone oily skin
Clay (Kaolin/Bentonite): Absorbs oil, detoxifies pores
Charcoal: Deep cleans pores, removes toxins
Zinc PCA: Controls sebum production
Recommended Cleansers for Oily Skin
Product Name:
CHI’SK Charcoal Face Wash
Key Ingredients:
Activated Charcoal, Tea Tree
Price : 100 Rs./ 100 ml
Product Name:
CHI’SK Tea Tree Face Wash
Key Ingredients:
Tea Tree essential Oil, Lemon Oil
Price : 100 Rs./ 100 ml
Common Mistakes to Avoid
Over-cleansing
Washing more than twice a day can strip natural oils, triggering more oil production.
Using harsh soaps
Bar soaps or alcohol-based products can irritate oily skin.
Skipping moisturizer after cleansing
Dry skin causes the skin to compensate by producing more oil. Always follow with a light moisturizer.
Using hot water
Can damage the skin barrier and worsen oil production.
2. Toning of Oily Skin
What Is a Toner?
A toner is a water-based liquid used after cleansing to:
Balance skin’s pH (which gets disrupted during cleansing)
Tighten enlarged pores
Remove leftover dirt or cleanser residue
Control excess oil
Prep the skin for serum/moisturizer by improving absorption
Why Toner Is Important for Oily Skin
Oily skin often:
Has enlarged, open pores
Feels greasy shortly after cleansing
Is prone to clogged pores and acne
A well-formulated toner helps:
Minimize the look of pores
Regulate sebum (oil) production
Soothe inflammation and calm acne-prone areas
Provide hydration without heaviness
How to Use Toner (Step-by-Step)
Step 1: Cleanse Your Skin
Use a foaming or gel cleanser for oily skin (see earlier cleansing steps)
Step 2: Apply Toner
There are 2 common ways:
Method 1: Cotton Pad
Soak a cotton pad with toner.
Gently swipe it across the face, especially oily zones (T-zone, cheeks, jawline).
Removes any remaining oil, dirt, or cleanser.
Method 2: Palm Patting
Pour a few drops into your palm.
Gently press and pat into the skin using fingertips.
More hydrating and skin-friendly (saves product too!).
Step 3: Let It Absorb
Allow 30–60 seconds before applying your serum or moisturizer.
Don’t wash it off.
Best Ingredients in Toners for Oily Skin
Cucumber Extract, Green Tea Extract, Pure Rose Water (natural option)
Recommended Toners for Oily Skin
Product Name:
CHI’SK Pure Rose Water
Key Ingredients:
Rose Extract, Glycerin
Price : 50 Rs./ 100 ml
Common Mistakes to Avoid
Using alcohol-based toners: These dry out the skin, which causes more oil production.
Skipping toner: Especially if you’re acne-prone, toner is a must for pore care.
Using too much: A little goes a long way — overuse can irritate sensitive skin.
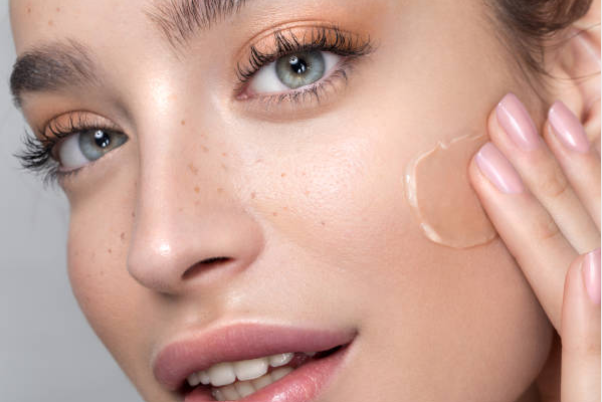
3. Moisturizing for Oily Skin

Why Oily Skin Still Needs Moisturizer
Many people with oily skin skip moisturizer, thinking it will make their skin oilier. But this is a big mistake.
When you skip moisturizing:
Your skin feels dehydrated.
It sends signals to sebaceous glands to produce more oil.
This causes clogged pores, breakouts, and increased shine.
So, oily skin needs hydration without heaviness — and that’s where oil-free, water-based moisturizers come in.
Benefits of Moisturizing Oily Skin
Balances oil production
Reduces acne and inflammation
Improves makeup application
Strengthens the skin barrier
Keeps skin soft, smooth, and healthy
How to Moisturize Oily Skin (Step-by-Step)
Step 1: Cleanse and Tone First
Always apply moisturizer on clean skin.
Toner helps balance the skin and enhances moisturizer absorption.
Step 2: Apply Pea-Sized Amount
Take a small amount of moisturizer on your fingertips.
Gently dot it on forehead, cheeks, nose, chin.
Step 3: Massage Gently
Use upward circular strokes to massage into the skin.
Don’t rub aggressively — be gentle to avoid stimulating more oil.
Step 4: Let It Absorb
Wait 1–2 minutes before applying sunscreen or makeup.
It should feel light, non-greasy, and hydrating.
Best Ingredients in Moisturizers for Oily Skin
Hyaluronic Acid : Hydrates without oil or clogging
Niacinamide (Vitamin B3) : Balances oil, reduces pores, calms redness
Salicylic Acid: Unclogs pores and treats acne
Aloe Vera: Soothes, hydrates, and cools skin
Glycerin: Attracts water into the skin
Rose Extract: Tightens pores, Fights acne-causing bacteria, Ideal for oily skin that still needs hydration
Recommended Moisturizer for Oily Skin
Product Name:
CHI’SK Rose Body Lotion (Moisturizer)
Key Ingredients:
Rose Extract, Glycerin
Price : 100 Rs./ 100 ml
Common Mistakes to Avoid
Skipping moisturizer altogether
➤ Causes more oil production & breakoutsUsing thick/heavy creams
➤ Clogs pores, leads to blackheads or acneUsing scented products
➤ Can irritate sensitive oily skin
4. Priming for Oily Skin
What is a Primer?
A primer is a product applied after skincare and before foundation.
It acts like a barrier between your skin and makeup to:
Control excess oil
Minimize the appearance of pores
Create a smooth surface for makeup
Increase makeup longevity (helps it stay on all day!)
Why Primer is Crucial for Oily Skin
Oily skin can cause:
Makeup to slide off or separate
A shiny or greasy look within a few hours
Enlarged pores and uneven texture
A mattifying, oil-control primer:
Absorbs excess sebum
Keeps your skin looking fresh and matte
Blurs pores and fine lines
Types of Primers for Oily Skin
| Primer Type | Function |
|---|---|
| Mattifying Primer | Controls shine, reduces oil |
| Pore-Filling Primer | Blurs large pores, smooths skin |
| Gel-Based Primer | Lightweight, hydrates without oil |
| Color-Correcting Primer | Evens skin tone if needed |
How to Apply Primer for Oily Skin – Step-by-Step
Step 1: Prep Your Skin
Cleanse, tone, and moisturize.
Let your moisturizer absorb fully (1–2 minutes).
Step 2: Choose the Right Primer
For oily skin, use a silicone-based, oil-free, or mattifying primer.
Step 3: Take a Pea-Sized Amount
Don’t overuse — too much can pill or create a greasy layer.
Step 4: Apply with Fingers or Sponge
Dab primer onto oily zones — usually T-zone (forehead, nose, chin).
Then blend outward gently using clean fingers, a sponge, or a brush.
Let it set for 30–60 seconds before applying foundation.
Pro Tips:
Use blotting paper before priming if skin feels oily.
For extreme oiliness, you can layer two primers:
Mattifying on T-zone
Hydrating/soothing primer on cheeks
Best Primers for Oily Skin
Insight 3-in-1 Primer: Budget-friendly, oil control
Swiss Beauty Real Make-Up Base Highlighting Primer (Mattifying Variant): Affordable with good oil control
When to Use Primer
| Occasion | Use Primer? |
|---|---|
| Daily makeup | Light primer |
| Special occasions/bridal | Long-wear mattifying primer |
| No-makeup look | Optional — Use only on T-zone |
Common Mistakes to Avoid
Using a dewy or illuminating primer — makes oily skin look shinier
Skipping moisturizer — skin compensates by producing more oil
Not letting skincare absorb first — can cause pilling
Using too much — leads to product buildup and cakey foundation
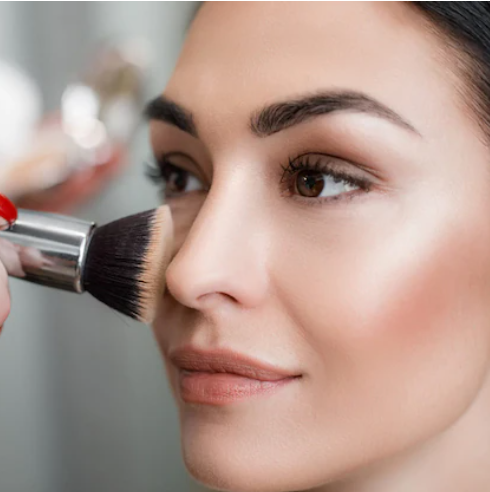
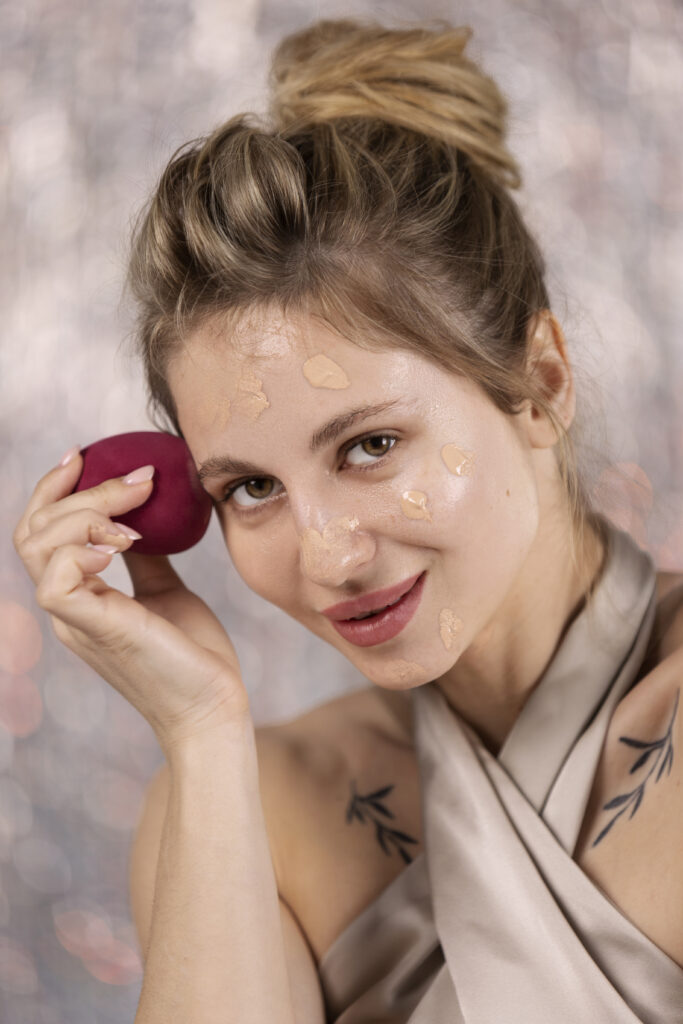
5. Foundation for Oily Skin
Why Foundation Matters for Oily Skin
For oily skin, the wrong foundation can:
Slide off quickly
Look greasy after a few hours
Settle into pores or fine lines
Cause breakouts if it clogs pores
The right process and products can make your foundation:
Last all day
Stay matte and fresh
Blur pores and control shine
FOUNDATION PROCESS FOR OILY SKIN(STEP-BY-STEP)
Step 1: Prep Your Skin Properly
Before foundation, follow this order:
Cleanser – remove oil and dirt
Toner – tighten pores, balance oil
Oil-free Moisturizer – light hydration
Mattifying Primer – smooth base and control oil
Let each product absorb for 30–60 seconds before the next step.
Step 2: Choose the Right Foundation Type
| Type | Ideal For |
|---|---|
| Matte liquid foundation | Best for oily skin – oil-free, controls shine |
| Powder foundation | Light coverage, good for daily wear or touch-ups |
| Stick foundation | Offers medium to high coverage, but choose oil-free sticks |
Look for labels like:
“Oil-Free”
“Non-comedogenic” (won’t clog pores)
“Long-wear” or “Matte finish”
Step 3: Apply Foundation – Methods
Tools You Can Use:
Damp beauty blender/sponge: For natural, smooth finish
Flat-top brush: For full, even coverage
Fingertips (only if sanitized): For light everyday wear
Steps:
Dot small amounts of foundation on your face: forehead, cheeks, nose, chin.
Blend outward in stippling or dabbing motions (don’t rub).
Focus more on T-zone (most oily area).
Blend into the neck for a natural finish.
➡️ Less is more – build coverage gradually to avoid a cakey look.
Step 4: Set the Foundation
Setting Powder:
Use a loose or pressed translucent powder.
Apply with a fluffy brush or powder puff, especially on oily areas.
Baking (optional for long wear):
Apply extra powder under eyes, chin, and forehead.
Let it sit for 5 minutes, then dust off the excess.
Step 5: Lock It with Setting Spray
Use an oil-control or matte finish setting spray.
Spray in an “X” and “T” motion for even coverage.
Top Foundation Recommendations for Oily Skin
Maybelline Fit Me Matte + Pore less: Budget-friendly, matte finish
How to Touch-Up Foundation During the Day
Use blotting paper or tissue to absorb oil — don’t wipe.
Lightly dab compact powder over oily areas.
Avoid adding more liquid foundation — it can look cakey.
Common Mistakes to Avoid
Applying foundation on un-moisturized skin – causes patchiness
Skipping primer – makeup won’t last
Using dewy or hydrating foundations – increases shine
Not setting with powder – leads to melting makeup
Using too much product – clogs pores and looks heavy
6. Concealer Process for Oily Skin

Why Concealer is Important
A concealer is used to:
Cover dark circles, blemishes, redness, and hyperpigmentation
Highlight areas of the face
Give a flawless, even skin tone
For oily skin, using the wrong concealer can lead to:
Creasing
Sliding off
Excess shine
Pore-clogging and breakouts
The key is to use matte, oil-free, long-wearing formulas with proper technique.
Best Type of Concealer for Oily Skin
| Type | Use |
|---|---|
| Liquid Concealer (Matte Finish) | Best for oily skin; lightweight and long-lasting |
| Cream Concealer (Oil-Free) | High coverage for spots or scars |
| Stick Concealer | Only if labeled as non-comedogenic and matte |
How to Apply Concealer – Step-by-Step (For Oily Skin)
Step 1: Cleanse, Moisturize & Prime
Follow your oily skin prep routine: Cleanser → Toner → Gel Moisturizer → Primer
This controls oil and smooths the base
Step 2: Apply Foundation First
Apply foundation before concealer to even out the skin tone.
This allows you to use less concealer and helps it blend better.
Step 3: Apply Concealer Strategically
For Under-Eye Circles:
Use a shade 1–2 tones lighter than your foundation.
Dot concealer in an inverted triangle under each eye.
Blend with a damp beauty sponge or small concealer brush using dabbing motion.
Avoid dragging or rubbing.
For Blemishes or Pimples:
Use a concealer that matches your foundation exactly.
Dab a small amount directly on the spot using a clean brush or fingertip.
Tap gently to blend edges into surrounding skin.
For Redness (around nose or mouth):
Apply a small amount and press into skin with sponge or brush.
Step 4: Set Concealer Immediately
Use a translucent loose powder to set the concealer.
Press it gently with a damp sponge or powder puff, especially under eyes and T-zone.
Let it sit for 2–3 minutes (baking), then dust off excess with a fluffy brush.
Lock It with Setting Spray
Use a matte finish setting spray to seal everything in place.
Spray in an “X” and “T” motion.
Recommended Concealers for Oily Skin
Maybelline Fit Me Concealer: Lightweight, oil-free, natural finish
Common Mistakes to Avoid
Using creamy or hydrating concealers — increases oil and creases
Skipping setting powder — leads to smudging and melting
Using wrong shade — light for spots or dark for under eyes
Applying thick layers — causes caking and patchiness
Blending with oily fingers — transfer of oil causes breakdown
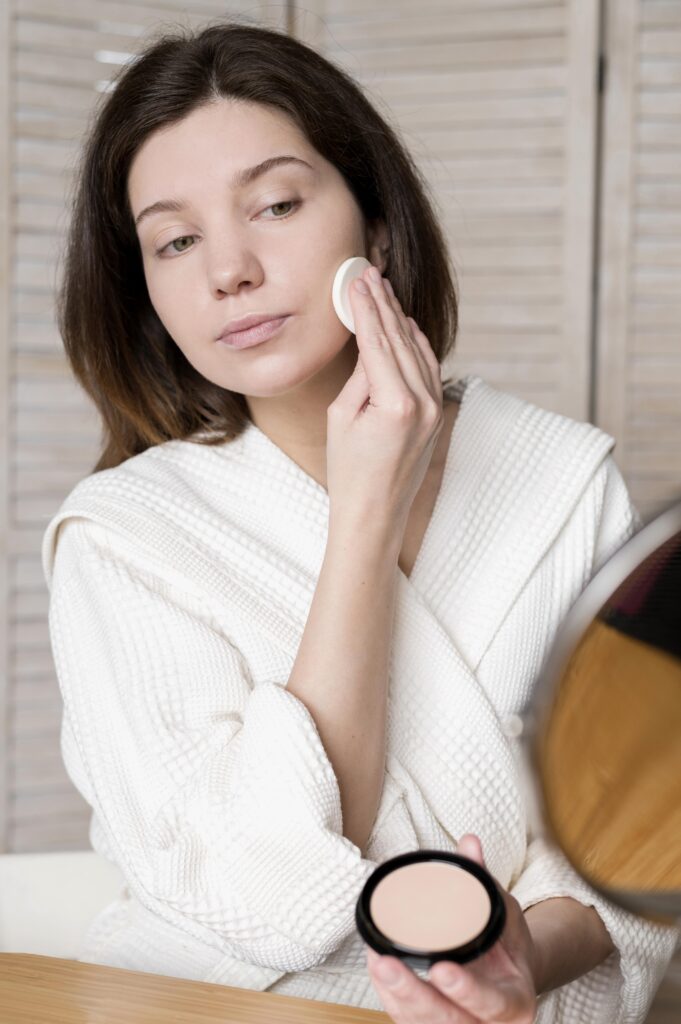
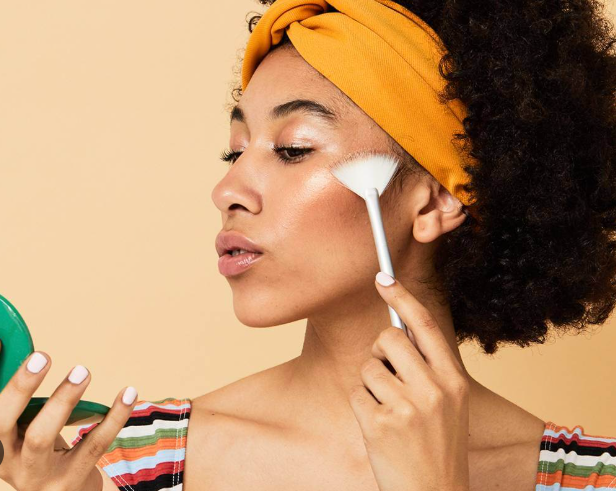
7. Setting Powder for Oily Skin
What Is Setting Powder?
Setting powder is a finely milled powder applied after foundation and concealer to:
Set makeup in place
Control shine and oil
Reduce the appearance of pores and fine lines
Help makeup last longer
For oily skin, setting powder is a must to prevent makeup from melting, fading, or looking greasy.
Why Setting Powder is Essential for Oily Skin
Without setting powder:
Makeup slides off quickly due to excess sebum
Skin looks shiny, not matte
Pores and texture become more visible
Concealer creases under eyes or around nose
With proper setting powder, your skin looks:
✔️ Smooth
✔️ Matte
✔️ Even
✔️ Long-lasting
Types of Setting Powder
| Type | Best For |
|---|---|
| Translucent Powder | Universal shade; controls oil without adding color |
| Tinted/Pressed Powder | Adds a little coverage; good for touch-ups |
| Loose Powder | Lightweight, best for full-face setting |
| Compact Powder | Convenient for on-the-go oil control |
Best Ingredients in Setting Powders for Oily Skin
Silica – absorbs excess oil, blurs pores
Talc or mica – helps mattify skin
Kaolin clay – detoxifies and reduces shine
Zinc oxide – soothes inflammation, offers mild sun protection
Rice powder – natural oil-absorbing ingredient
How to Apply Setting Powder – Step-by-Step for Oily Skin
Step 1: Apply Foundation and Concealer
Ensure your base makeup is well blended.
Step 2: Choose the Right Powder Tool
Use a fluffy powder brush for light all-over setting.
Use a damp beauty sponge or powder puff for long-lasting matte finish (especially T-zone).
Use small detail brush for under eyes.
Step 3: Application Techniques
✅ Basic Setting:
Dip brush or sponge into powder.
Tap off excess.
Lightly press and roll onto oily areas — forehead, nose, chin.
✅ Baking (For Oily or Bridal Looks):
Apply a heavy layer of loose powder on areas like under eyes, jawline, nose.
Let it sit for 3–5 minutes.
Dust off the excess with a clean fluffy brush.
Step 4: Finish With Setting Spray
Use a matte finish makeup setting spray to lock in powder and prevent dryness.
Top Setting Powders for Oily Skin:
Maybelline Fit Me Loose Powder
When to Apply Setting Powder
| Time | Where |
|---|---|
| After foundation/concealer | T-zone and oily areas |
| Before eye makeup | To avoid fallout |
| After blush/contour (optional) | To blend everything smoothly |
| For touch-ups during the day | Use compact powder or blotting with sponge |
Common Mistakes to Avoid
Using powder with shimmer or glow — enhances shine
Applying too much — makes face look dry or cakey
Skipping setting spray — powder can look flat or dusty
Using the wrong shade — can turn grey or orange on skin
Applying on unblended foundation — causes patchiness
Pro Tip:
Carry a compact or blotting powder during the day to touch up oily zones without layering too much product.
8. Eye & Brow Makeup for Oily Skin
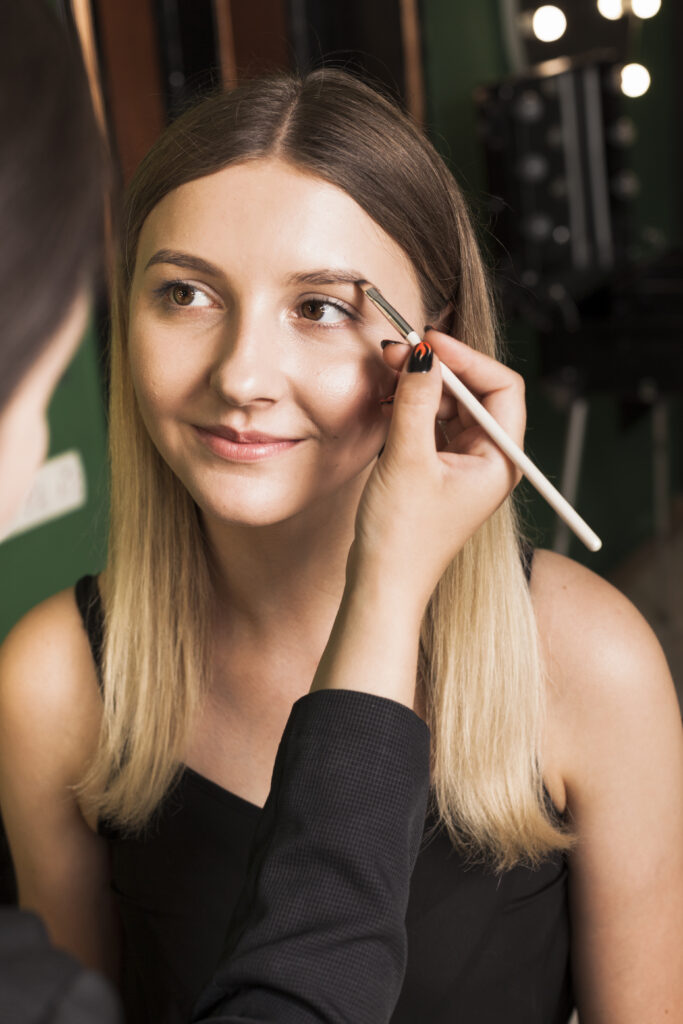
Why Special Care for Oily Eyelids/Brows?
Oily skin can cause:
Eyeshadow to crease or fade quickly
Eyeliner to smudge or melt
Brows to lose shape or look greasy
✅ Using the right prep + long-wear products ensures clean, sharp, long-lasting results.
STEP 1: PREP & PRIME
Eyelids:
Clean the lids with a gentle wipe or blot with tissue.
Apply a mattifying eye primer or a dab of concealer + loose powder.
This absorbs oil and creates a smooth base.
✅ Recommended Eye Primers:
Urban Decay Eyeshadow Primer Potion (premium)
Wet n Wild Photo Focus Eyeshadow Primer (budget)
Swiss Beauty Eye Primer (affordable)
Brows:
Use a spoolie brush to remove oil and fluff brow hairs.
Apply a touch of translucent powder over brows if they get shiny.
STEP 2: EYE MAKEUP APPLICATION
✅ Eyeshadow Tips for Oily Lids:
Use powder eyeshadows, preferably matte or semi-matte.
Avoid cream shadows unless they are waterproof.
Press the pigment onto the lid instead of swiping.
🔸 For extra longevity, layer:
Eye primer
Neutral matte base shade
Desired color
Blend with clean brush
Lock with a setting spray
✅ Eyeliner:
Choose gel-based or waterproof liquid eyeliner.
Avoid pencil liners unless smudge-proof.
For a long-lasting waterline look, use kohl + powder eyeshadow to seal.
✅ Recommended Eyeliners:
Maybelline Gel Eyeliner
Lakmé Insta Liner (Waterproof)
Faces Canada Magneteyes Eyeliner
Colorbar Waterproof Liquid Eyeliner
✅ Mascara:
Always use waterproof mascara for oily lids.
Curl lashes first for extra lift.
✅ Recommended Mascaras:
L’Oréal Lash Paradise Waterproof
Maybelline Colossal Waterproof
Sugar Uptown Curl Waterproof Mascara
STEP 3: BROW DEFINITION
Step-by-Step Brow Process:
Brush brows upward with spoolie.
Use a pencil, powder, or pomade to fill sparse areas.
Follow the natural shape — light hand in the front, more definition at the arch and tail.
Blend with spoolie for natural finish.
Set brows using clear brow gel or soap for oily skin (gives better hold).
✅ Brow Products:
Miss Claire Waterproof Eyebrow Pencil
Etude House Drawing Eyebrow
Sugar Arch Arrival Brow Definer
Anastasia Beverly Hills Brow Freeze (high-end)
🔐 STEP 4: SET & FINISH
Lightly dust translucent powder on eyelids & brows after eye makeup (optional).
Mist entire face with matte setting spray to lock everything in.
✅ Setting Sprays:
Maybelline Lasting Fix Matte Spray
Swiss Beauty Makeup Fixer
PAC Micro Finish Makeup Fixer
Common Mistakes to Avoid
Skipping eye primer — causes creasing
Using creamy products — melts with oil
Overfilling brows — looks harsh or greasy
Not setting eyeliner/mascara — leads to smudging
Using shimmer on oily lids without base — emphasizes oil
9. Blush & Contour for Oily Skin
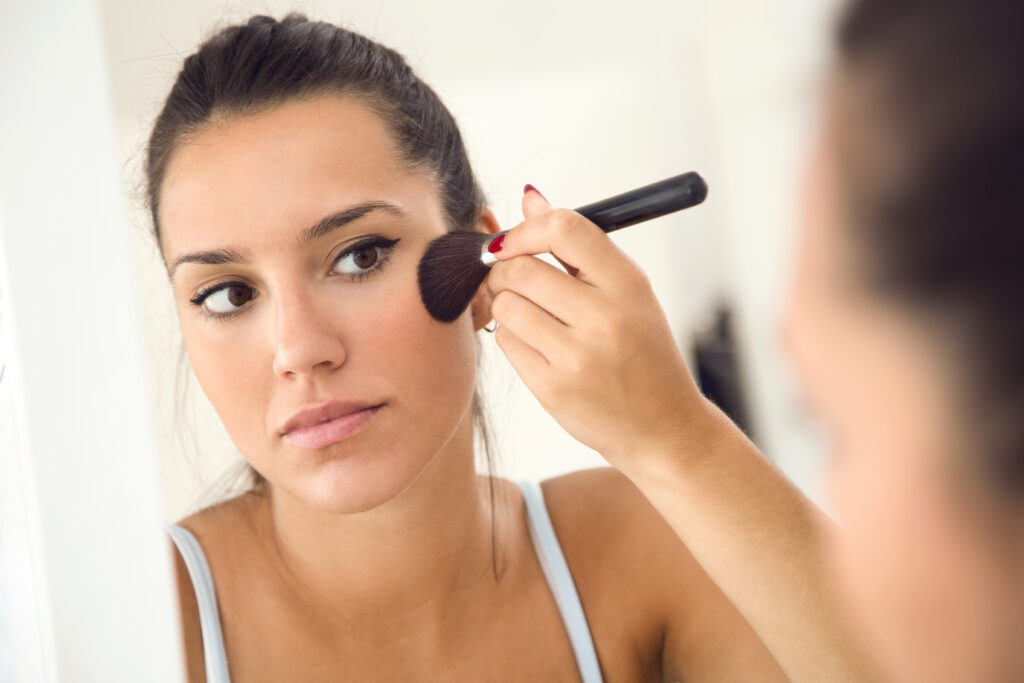
Why It Matters for Oily Skin
Oily skin tends to:
Make powder products slide off or fade
Emphasize pores and texture
Get shiny where blush or contour is applied
✅ The right products + techniques = matte, sculpted, and long-lasting finish
STEP 1: PREP IS EVERYTHING
Before applying blush or contour, make sure:
Skin is cleaned, toned, moisturized (with gel-based)
Base makeup (foundation & concealer) is set with powder
Use matte or oil-control primer underneath
Best Types of Blush:
| Type | Use |
|---|---|
| Matte Powder Blush | Best for oily skin, long-wear & oil-absorbing |
| Tinted Gel or Stain (oil-free) | Lightweight, natural finish |
| Avoid cream blush | It slips easily on oily skin |
How to Apply Blush (Step-by-Step)
Use a fluffy angled brush
Pick up matte blush, tap off excess
Apply on the apples of cheeks, blend towards the temples
Use small circular strokes to blend
For oily skin: set again with a light touch of translucent powder
✅ Pro Tip: Use cool pinks, peaches, and corals for oily skin — avoid shimmer-heavy blushes.
Recommended Blushes for Oily Skin
Maybelline Fit Me Blush (Matte Finish)
Sugar Contour De Force Mini Blush
Colorbar Cheekillusion Blush
Swiss Beauty Baked Blush (for soft glow without oil)
CONTOUR for Oily Skin
Best Contour Types:
| Type | Use |
|---|---|
| Matte Powder Contour | Ideal for oily skin – blends smoothly, controls shine |
| Oil-free contour sticks | Only for targeted use (blend quickly & set with powder) |
| Avoid creamy or dewy formulas |
🖌️ How to Apply Contour (Step-by-Step)
Use a small angled brush or contour brush
Apply contour below cheekbones (ear to mid-cheek), jawline, sides of nose, and forehead edges
Blend with a clean fluffy brush or sponge
Use translucent powder to soften any harsh lines
✅ Pro Tip: Use shades 1–2 tones darker than your foundation (cool undertone preferred for sculpting)
Recommended Contour Products for Oily Skin
Sugar Contour De Force Face Palette (includes blush, highlighter)
Makeup Revolution Ultra Contour Palette
Wet n Wild MegaGlo Contouring Palette
NYX Professional Matte Bronzer (as contour)
Finishing Touch
Lightly dust loose powder over contoured & blushed areas for oil control
Finish with matte setting spray to lock in
✅ Setting Sprays:
Maybelline Lasting Fix
PAC Micro Finish Fixer
Swiss Beauty Makeup Fixer (Matte)
Common Mistakes to Avoid
Using creamy blush/contour on oily skin – leads to patchiness
Not setting cream products – causes melting
Applying shimmer blush/bronzer – increases shine
Using a shade too dark – looks muddy, not natural
Skipping setting spray – makeup doesn’t last
10. Setting Spray
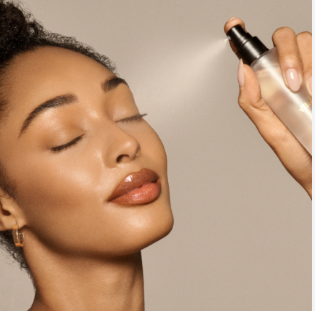
What Is Setting Spray?
A setting spray is the final step in your makeup routine. It is a fine mist that:
Locks in makeup for hours
Reduces shine and oiliness
Helps makeup stay smudge-proof, sweat-proof & transfer-resistant
Provides a natural, skin-like finish without caking
Why It’s Important for Oily Skin
Oily skin can cause:
Foundation and concealer to separate
Eye makeup and blush to fade
Makeup to slide off after a few hours
A matte or oil-control setting spray keeps everything in place and controls sebum throughout the day.
Types of Setting Spray for Oily Skin
| Type | Features |
|---|---|
| Mattifying Spray | Controls shine and oil, best for oily skin |
| Long-Wear Spray | Keeps makeup fresh for hours |
| Oil-Control Spray | Specifically targets sebum and T-zone greasiness |
| Fixing Spray | Blends powder layers and removes a powdery look |
How to Use Setting Spray – Step-by-Step
Step 1: Complete Your Full Makeup Look
Do your full base: primer, foundation, concealer, powder, blush, contour, brows, eyes, lips
Step 2: Shake the Bottle
Especially if it contains mattifying agents — shake well for even distribution
Step 3: Hold 8–12 Inches Away
Hold bottle at arm’s length from your face
Step 4: Spray in “X” and “T” Motion
This covers the entire face evenly
Spray 2–4 times, keeping eyes closed
Step 5: Let It Air Dry
Don’t fan or rub — let it set naturally for 30–60 seconds
Pro Tips for Oily Skin
Use before and after makeup for extreme longevity (layering technique)
Use a matte fixing spray on a beauty blender to press into the T-zone for oil control
Blot with tissue if needed, then respray lightly for refresh
Best Setting Sprays for Oily Skin
| Product | Features | Price Range |
|---|---|---|
| Maybelline Lasting Fix Setting Spray | Matte finish, long-wear | ₹700–900 |
| Swiss Beauty Makeup Fixer (Matte Finish) | Budget-friendly, lightweight | ₹250–350 |
| PAC Micro Finish Fixer | Professional finish, oil control | ₹900–1200 |
| NYX Matte Finish Setting Spray | Oil control, cult favorite | ₹800–1000 |
| Colorbar Stay the Day Finishing Mist | Controls shine, alcohol-free | ₹600–800 |
| L.A. Girl Pro Setting HD Spray (Matte) | Lightweight, long-lasting | ₹700–850 |
Mistakes to Avoid
Spraying too close – causes blotches or dripping
Using dewy sprays – adds unwanted shine
Skipping spray on hot or humid days – makeup melts quickly
Touching face before spray dries – ruins setting
Pro Tips for Oily Skin Makeup
Use oil blotting papers mid-day.
Wash brushes/tools weekly to avoid breakouts.
Always double cleanse at night (oil cleanser + foam).
Dealing with oily skin doesn’t mean you have to compromise on a flawless, long-lasting makeup look. With the right skincare prep, oil-control products, and smart techniques — you can create a smooth, matte, and radiant finish that lasts all day without melting, creasing, or excessive shine.
Remember, oily skin just needs a bit more balance and the right choices — not more product.
- Choose matte, non-comedogenic formulas
- Stick to a layered, set-and-seal approach
- Finish strong with a setting spray to lock your look
Your skin deserves makeup that stays with you — fresh, matte, and worry-free.
Guidance For Lips:
Though lips aren’t oily, oily-skinned individuals benefit from long-wear, transfer-proof lipsticks, especially in hot or humid weather.
Lip Prep (Before Lipstick Application)
Exfoliate (2–3 times a week)
Gently scrub lips with a sugar lip scrub or soft toothbrush to remove dry skin.
Moisturize (before base makeup)
Use a lightweight, non-greasy balm (e.g., Laneige Lip Balm, Vaseline Lip Therapy).
Let it absorb, then blot excess with tissue before applying lipstick.
Pro Tips for Long-Lasting Lipstick:
Outline lips with a lip liner to prevent feathering.
After applying lipstick, blot with tissue, add a second layer for durability.
For extra staying power, dust a little translucent powder over a tissue placed on lips.